Step 2 - Creating Categories and VMs on the Prism Central
Create the Virtual Machines to be associated with each subnet
To create the Virtual machines, click on "Compute & Storage"
Click on "VMs"
Check on the check box on "CentOS VM"
Click on the "Actions", click on "Clone"
Click Advanced Configuration
Input the following parameter
- Name: Web-VM
- Number of Clones: 2
- Networks: Primary
Once done, clone the VM
Power on the VMs
Verify the VMs are able to get the IP address in that subnet
Verify login to the VMs Username: root Password: nutanix/4u
Repeat the steps for the DB VMs
Creating Categories
Under the Infrastructure in the App Switcher
Scroll down on the side bar to go to "Administration"
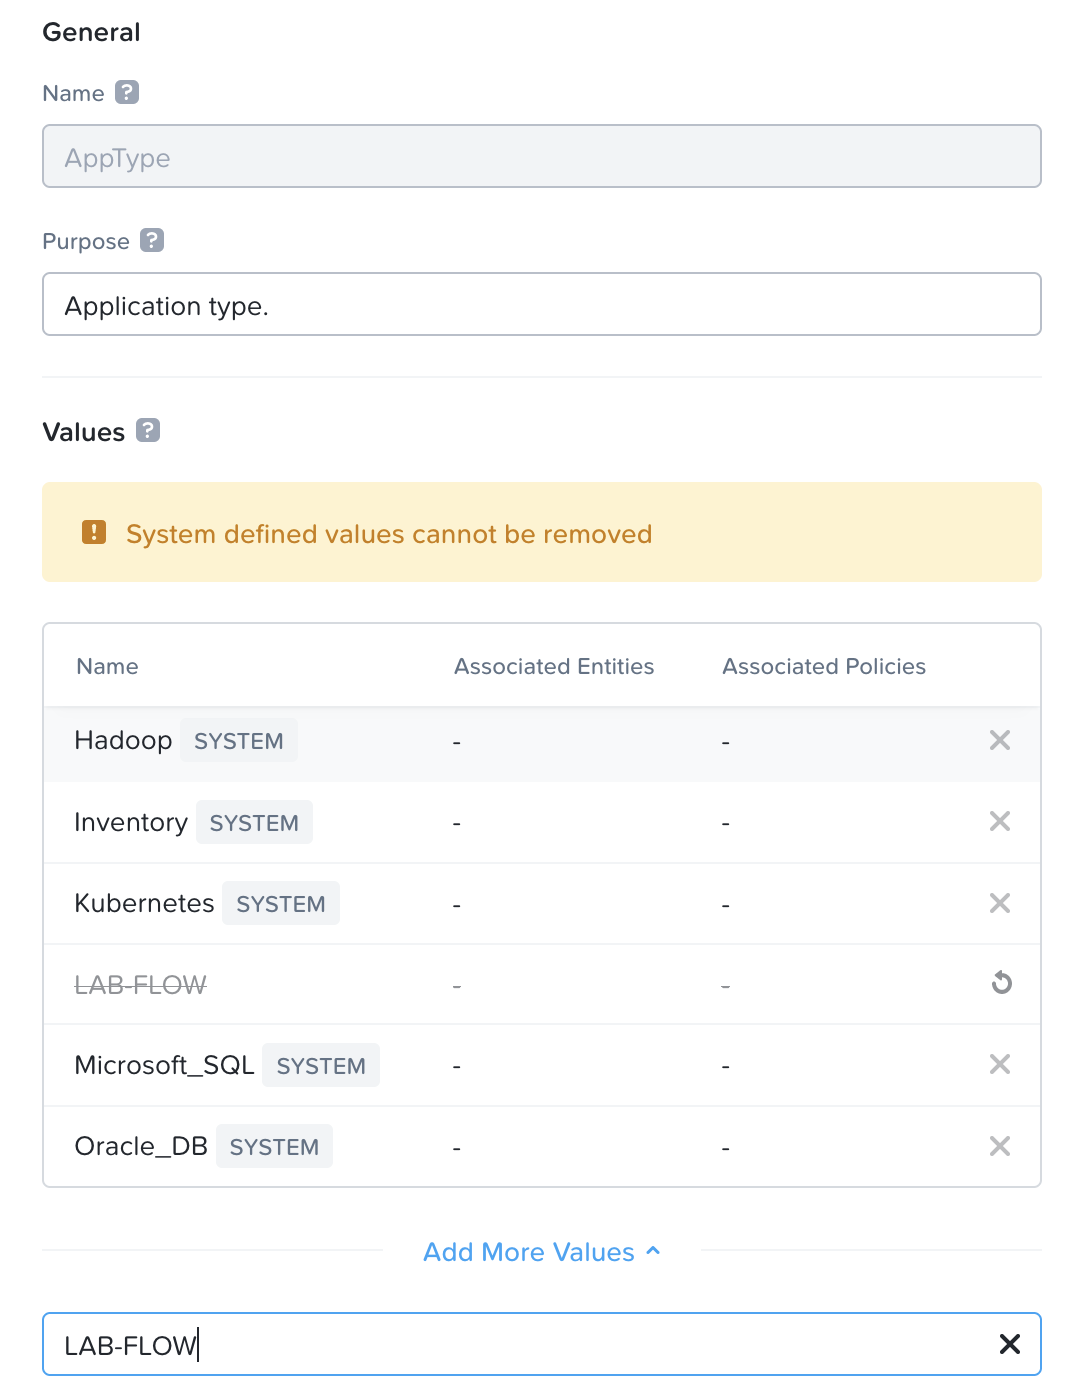
Click on the "App Type"
- Add in a new App Type value - "LAB-Flow"
- Click Save
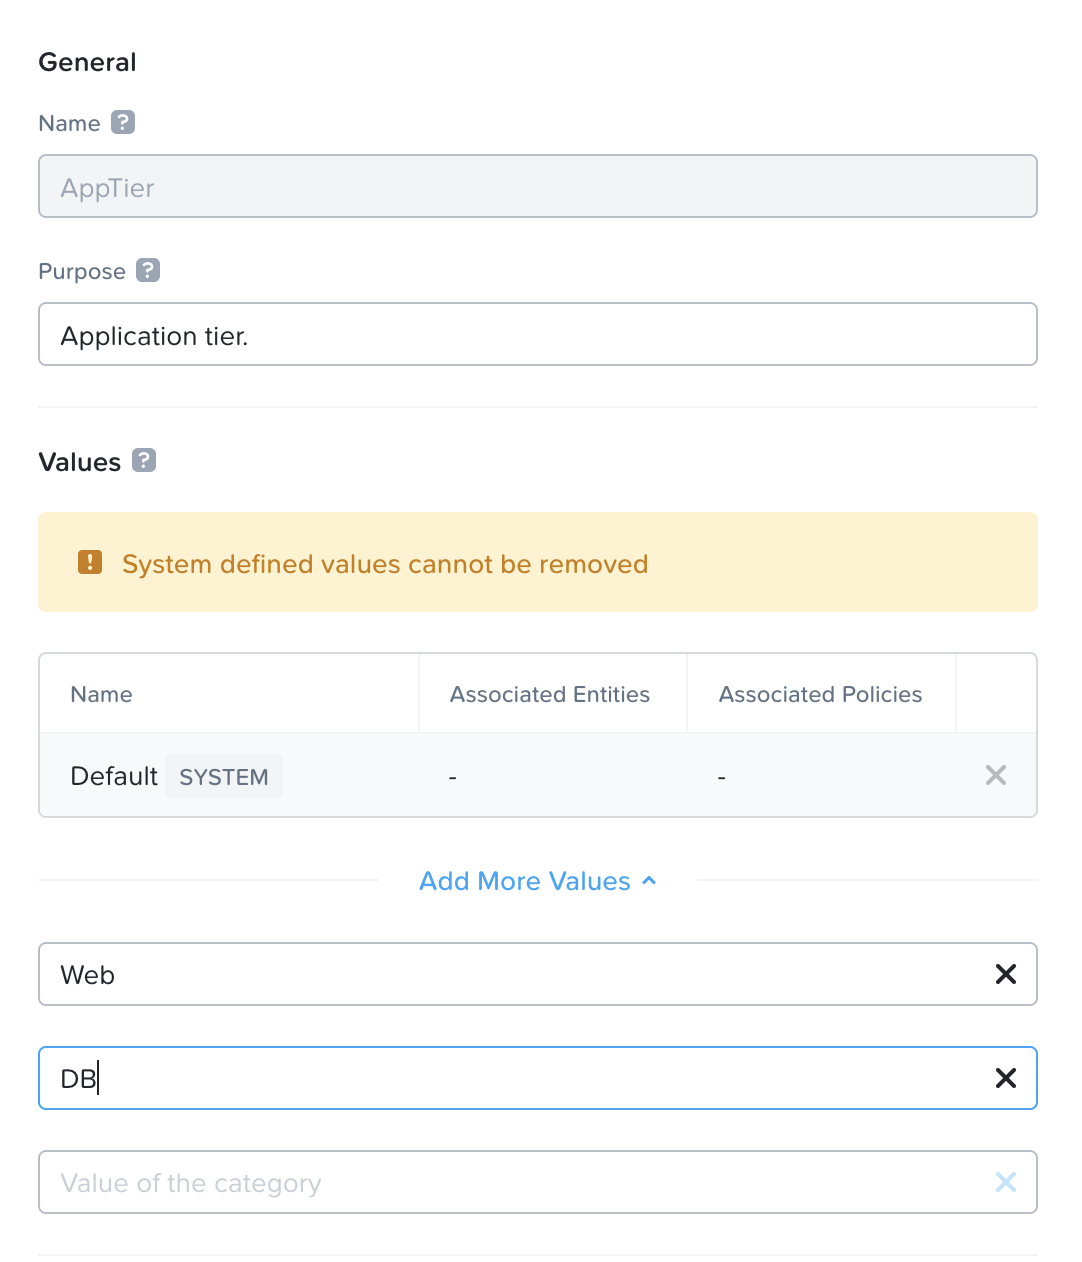
Click on the "App Tier"
- Add in a new App Tier value - Web
- Add in a new App Tier value - DB
- Click on Save
Assigning Categories to the Virtual Machines
Assign the VMs that were created previously into their respective categories.
Scroll down on the side bar to go to "Compute and Storage", Click on "Virtual Machines"
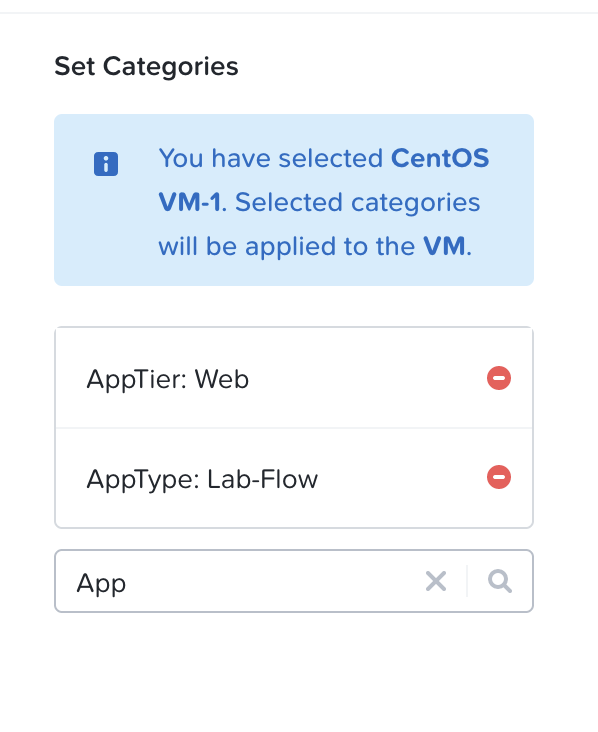
Click on the checkbox beside the Web Server VMs, Click on the Action dropdown box. Click on "Manage Categories" , search for the following: For the Web Servers,
- App Tier - Web
- App Type - LAB-Flow
For the DB Servers,
- App Tier - DB
- App Type - LAB-Flow
A sample of the output as per the screenshot below
- Click Save.
To verify the VMs are assigned to the categories
- Under the Infrastructure in the App Switcher
- Scroll down on the side bar to go to "Administration"
- Click on "Categories"
- Click on the "App Type" Category & "App Tier" Category
- Verify that the VMs are listed and populated in the right values.