Step 3 - Creating the VPC
Creating the VPC
- Navigate to “Network & Security”. Click on the Virtual Private Cloud option. Click on "Create VPC", the following screen will appear
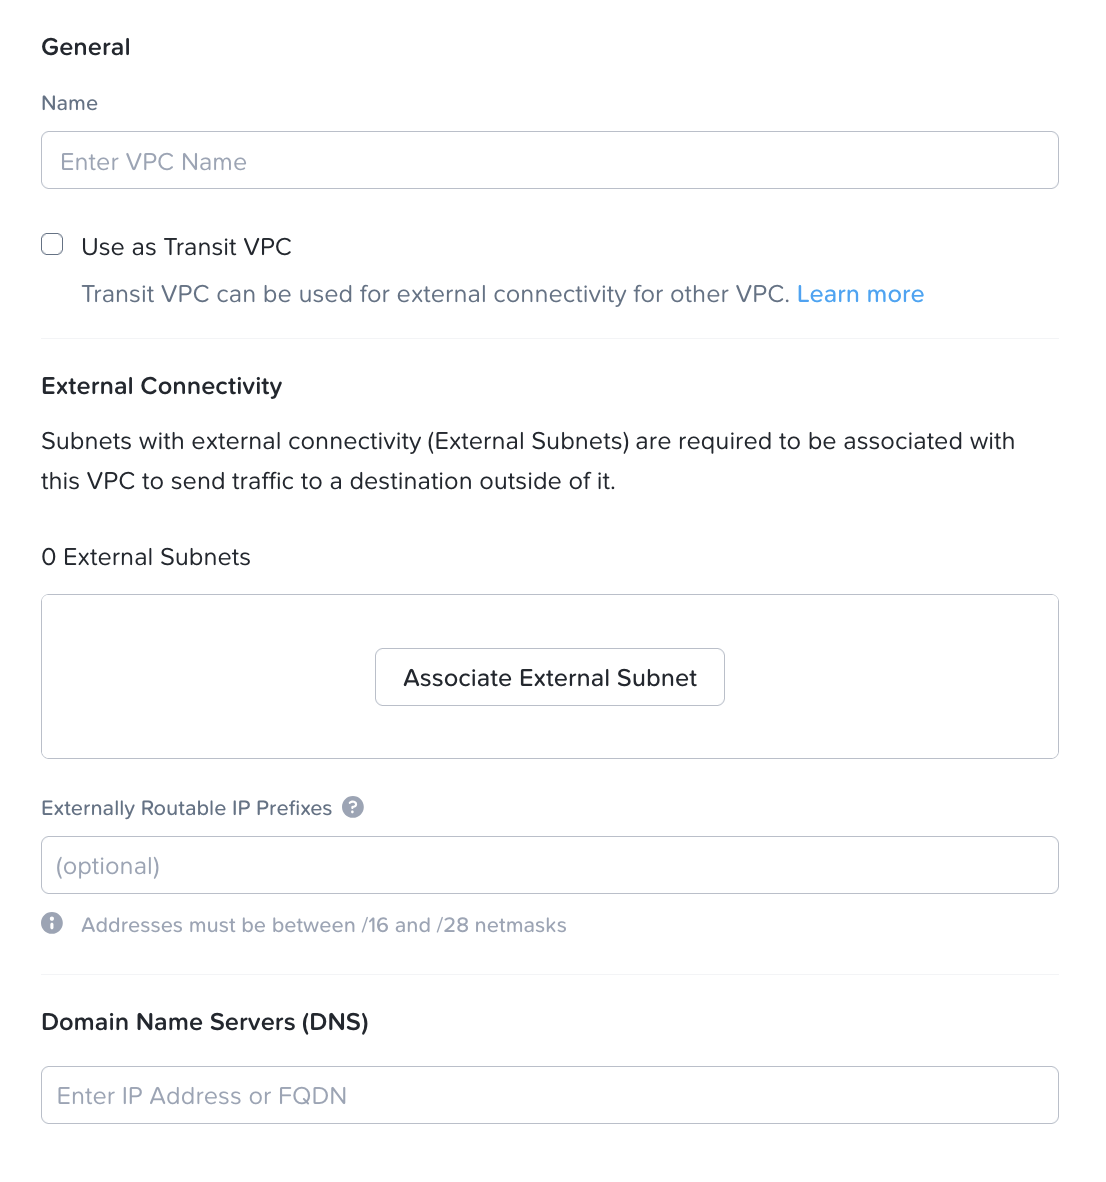
- Input the following parameters
- Name: "VPC Name to be created"
- Do not check on the box for the "Use as Transit VPC"
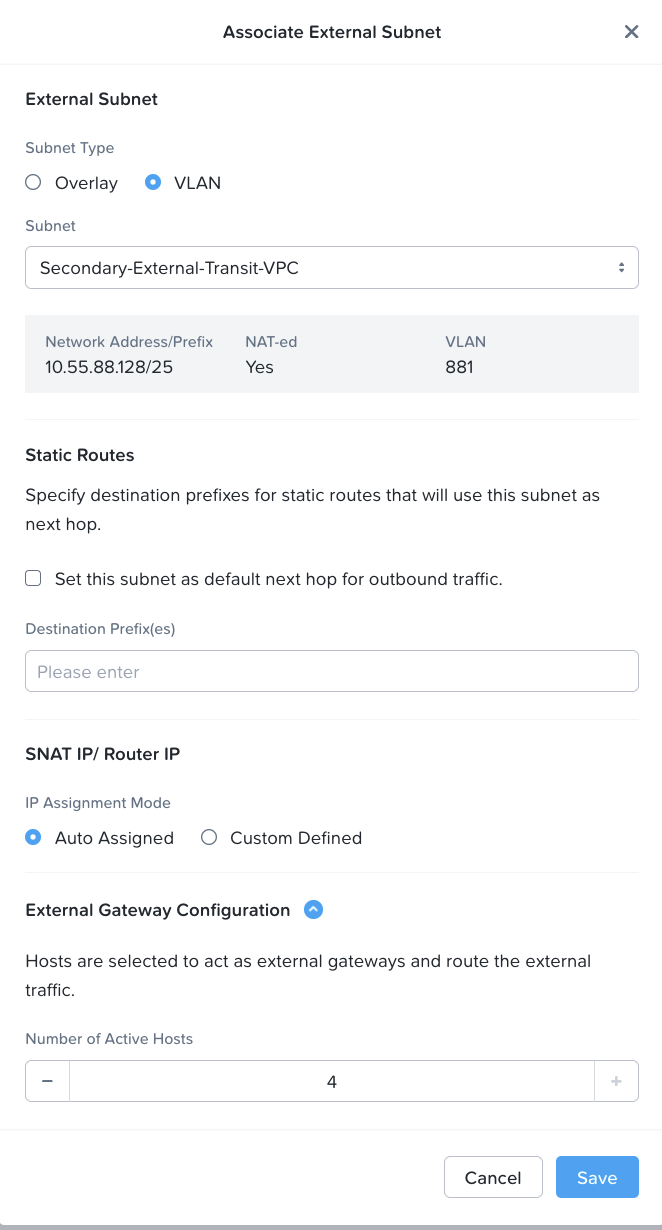
- Click on the "Associate External Subnet" Under the external subnet, Subnet Type: VLAN External Subnets: "Select the name of the External Subnet that was created in Lab 2" Click on the checkbox to "Set this subnet as default next hop for Outbound Traffic" SNAT IP / Router IP: Auto Assigned External Gateway Configuration: 4 (This will configure the Gateway Scaleout feature to allow up to 4 active gateway) Click "SAVE"
- External Routable IP address: "Leave it empty"
- Domain Name Servers:  10.42.194.10
- Click on the "Create" button to create the VPC